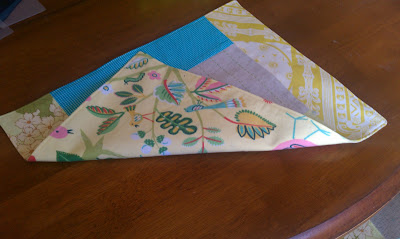
If imitation is the sincerest form of flattery, then Janelle at Sew to Speak should be super flattered. I saw these placemats on the Sew to Speak blog and I absolutely had to make some myself. Apparently, they are inspired by some that were available at Anthropologie, though I never saw them myself. While making these, I thought a little sadly that I wouldn't keep them for myself. Though I love the look of fabric placemats, having children has given me a heightened appreciation for cheap, plastic placemats that never have to be washed or ironed. I gave these to my mother as a gift, and I think they'll be much happier in their new home.
I'm sure that, like me, others sometimes buy packs of coordinating fat quarters without really having a need for them. This is a great project for a pretty bunch of fabric. I don't know what Janelle's measurements for her placemats were, but this is what I did:
- I bought a pack of 5 fat quarters and cut them into 4" strips.
- The 4" strips were cut to lengths of 19" (A), 7.5" (B), 14.5" (C) and 12" (D). To make 6 placemats, you'll need 6 pieces in each length.
- Use a neutral fabric (like this linen-blend) and cut 6 pieces that measure 7.5"x12". I think that it might be really neat to use a brightly-colored solid fabric in the center, too. There are lots of things that could be done here.
- For three of the placemats, you'll sew piece B to both short sides of the linen with right sides together. Press the seams open and sew piece A, right sides together, to the long sides.
- For the other three placemats, sew piece D to the long sides of the remaining linen pieces, right sides together. Press the seams open and sew piece C to the short sides of the linen piece that you've just created.
- At this point, I recommend pressing all seams open. The placemat should be about 18"x14".
- Cut 6 pieces of iron-on interfacing to 18"x14" and attach it to the back of your placemats.
- You'll want to use an embroidery hoop to hold your placemats while you embroider the stripes in the center.
- Use masking tape to mark even lines, either horizontal or vertical, on your placemats. Mine are all vertical lines, but the Sew to Speak placemats used some horizontal stripes.
- Using an embroidery needle and perle cotton or embroidery floss, stitch small lines along the edges of your masking tape. The tops of the stitches should be a bit longer than the stitches on the underside.
- Once you have finished stitching your lines, cut 6 pieces of home decor fabric or quilting fabric to about 18"x14".
- Right sides together, stitch the pieces together, leaving a 4" gap for turning.
- Clip corners and turn placemat right-side out. Press.
- Sew around the placemat, about 1/8" from the edge.
These directions are very brief - I'm happy to elaborate for anyone who is interested.
I didn't have enough fabric to give all of the placemats matching backs - instead, I used some miscellaneous home decor fabric from Joann to complete the placemats. All of my placemats are different on top, so I think that the mismatched backs are appropriate.
I just love the mismatched goodness of these placemats - I am so glad that I saw the originals on the Sew to Speak blog!


So glad you liked our post! your placemats are lovely!
ReplyDeleteThanks! I think there will be matching napkins in the near future!
ReplyDelete