Showing posts with label michael miller. Show all posts

Monday, May 14, 2012

Josh's new PJ's

Josh has been needing a new pair of pajamas for quite some time, and I finally got around to sewing some a few days ago.  Really simple, but just perfect.  I used the Kickin' Back Sweats pattern from 'Sewing for Boys', mostly because I already had the pattern traced and cut out.  'Sewing for Boys' does have an actual Pajama pattern, but I really just wanted to use what I already had ready.


Obviously, I left off the pocket at the bottom, as I didn't really have a good contrasting fabric (or maybe I do and just don't realize), and I didn't think he needed a pocket for pajamas.  Maybe he would have appreciated one.


These pants are pretty long, I added extra length to the bottom of the pants, in the hopes that they'll still fit in the fall.  He won't usually be wearing them outside (this is an exception!), so I think it will be fine.

Look at all that money - maybe I should have included a pocket after all!


The fabric is a wonderfully soft Michael Miller Children at Play flannel.  I'm hoping that I have enough left over to make a pair of sleep shorts.  I may buy a little extra fabric and use contrasting fabric to make shorts - we'll see.  If I can get away with making shorts without buying more fabric, I'd prefer to do it that way.


Hurray for kids in pajamas!

Friday, May 4, 2012

Fat Quarter Gardening Aprons

Well, I apologize for being a bit AWOL this week - it's been super busy!  Unfortunately, I haven't been busy with sewing-related projects, but I've been a bit swamped with job/family/yoga-related projects (Okay, the yoga isn't so much a "project" as an "activity").  This isn't necessarily a bad thing, but it isn't really relevant to sewing either.  However, I do have a couple projects to show off:


This is a project that I saw on Sew Mama Sew a few weeks ago, and I decided that I needed to make a couple.  One for myself, one for my mother.  I think the blue and green one will have to be for my mother - she is a more avid gardener than I am, and I think the darker colors will hide dirt better.  I don't garden as much, so the lighter color might stand a chance.

All of my fat quarters came from Sew to Speak, but I can't really say who the designers are.  One is an Anna Maria Horner print.  I absolutely love the ties - this is a Michael Miller bias tape.  I have so many ideas for this notion.  I'd like to have a messenger bag with this around the edges, and I'd like to have either a skirt or a top (maybe both) with this for trim.  One thing at a time.

It's a really fun project, and the apron looks fantastic on my beautiful, skinny daughter who was kind enough to model for me.  I think they'll be fine for my mother and myself, but if a person is too much bigger, they may need to use larger pieces of fabric so that the apron covers the entire front of their waist.  But this is just a suggestion - I don't think you'd want it to look too narrow in the front.

Fun stuff!  

The other day at Target, my daughter fell for a pretty floral summer dress - pinkish-purple with ruffles.  My immediate response was "I can totally make that".  So I plan to.  Soon.

Have a great weekend!


Monday, April 30, 2012

Liebster Blog Award

 Recently, I was honored to be given the Liebster Blog Award by the lovely Laura of sew.knit.grow - she and I have been trading comments on sewing lately.  Not only does she create some lovely sewn goods, but beautiful knit projects as well (which I'm sure everyone could guess from the blog title!) - it makes me wish I were better at knitting.

The idea of the Liebster award is for the recipient to forward the honor to three other small blogs.  I'm a little unsure of how small a blog has to be to qualify (sew.knit.grow says about 200 followers or less), so I'm sort of just guessing.  I'm hoping that these blogs have approximately the right number of followers.  With that in mind, here are my three:
Africankelli:  I've been following Africankelli's blog for the past few months.  I was initially drawn to the blog because of the Fabric-by-Fabric One-Yard Wonders sew-along, but there are lots of other fun things going on there as well.
Selfsewn: I've been following this growing blog for a few months.  Such beautiful quilts!  The author does some really helpful tutorials.  I have never used the English Paper Piecing Quilting method, but selfsewn makes me want to.
Kunklebaby:  I'll be honest, even though there is a lot of sewing going on here, I just love the photos of the little ones.  The sewing is lovely to look at, too.

And, because I can't help myself, here are some beautiful fabrics that should be arriving in my mailbox in the very near future:
London Calling Lawn Deco Bloom VintageBird's Eye Pique Pale BlueMichael Miller Children At Play Flannel Chasing Airplanes Blue
From left: Robert Kaufman Lawn, Pale Blue Pique, Michael Miller Children at Play Flannel

Sewing for Boys April Sew-along

When the 'Sewing for Boys' April pattern  was announced, I wasn't sure that I would participate this month - I've already made two pairs of the Treasure Pocket Pants (a pair with Penguins and a pair with Puppies).  So I felt that we were in a good place with Treasure Pocket Pants already.  Then I realized that this was an excellent opportunity to sew something cute for my 3-month-old nephew.


Now, you may be asking, "How did you sew these for your nephew, isn't the smallest pattern size 12-18 months?"  Okay, so maybe you weren't asking that at all, but I'll answer anyway.  These pants are 12-18 months, and I'm thinking they'll fit my nephew next fall/winter.  He's a big baby, so I'm guessing that they'll fit sooner rather than later.  Unfortunately for us, this means that we won't have any cute photos of babies today.


One reason that I made these way-too-big pants was the fact that I already had all of the materials in my stash.  My aunt gave me the tan canvas/denim fabric that I used for the main part of the pants, and I bought the cute owl print at Sew to Speak.  For the record, the owl print is a Tammis Keefe/Michael Miller print - the third Tammis Keefe print that I've bought.  I love them all!


I didn't really do anything special with this pattern.  The waist facing is narrower than the instructions require, and I used a slightly differnt method for attaching the bottom hem facings, but these are really minor changes.  You may also notice that I used the main canvas fabric for the top side panels, while in the past I've used the contrast fabric all the way up the side.  I really like the result either way.


Of course, even though the recipient is out of town, my son couldn't resist the opportunity to have his picture taken.  Comparing this photo to the pictures of him in his puppy pants really makes me realize how badly this boy needs a haircut!  I promise - short hair will be in the very near future.

Thursday, April 26, 2012

The REAL reason I bought the Alligator fabric

After making my daughter's alligator skirt, I felt that I absolutely had to work on my blouse in the same fabric.  Luckily, I already had the pattern cut out.


I used Colette's Sorbetto pattern, which was lovely.  The pattern was simple enough that after cutting out my pieces, I just glanced over the instructions then sewed without really referring to the pattern at all. And, because this is a free downloadable pattern, I did something that I never do - I cut right into the pattern after taping the pages together.  No tracing for me!  Tracing can be so tedious, and if I want to sew one in a different size, I'll just download the pattern again (but, because it fits so well, that seems unlikely).

Joanna took this picture - it is important to her that there be a fabric close-up

The most time consuming part was making my own bias tape for the edges - even using the continuous bias tape method, it takes a while.  It's all the pressing involved after everything has been cut.  I had planned to use store-bought bias tape, but it seemed like an unnecessary hassle when I had so much leftover fabric.


Even though I have now officially accomplished my Alligator fabric mission, I don't think we've seen the last of this print - I'm going to make sure every scrap gets put to good use.

Monday, April 23, 2012

Chomp goes the Alligator

A girl can never have too many skirts.  I should know - I have a closet full of them.  And, I'm working on filling Joanna's closet as well.  So, when Joanna said that she wanted a skirt made from the Alligator fabric that I had in my stash, I was happy to oblige.


I suppose it takes the right kind of person, but my daughter and I both really love this fabric.  It's a Tammis Keefe print from Michael Miller that I picked up at Sew to Speak.  I originally bought the fabric to make a blouse for myself, so when Joanna asked for the skirt, I went back to the store and bought more (I still plan to make that blouse!).  


This skirt is made in almost the same way that I made these skirts a couple months ago.  The only difference is that this skirt isn't quite as full - The rectangles that I cut were about 38"x18", instead of 44"x18".  The fact that the skirt wasn't quite as full as last time made it easier to feed the elastic through, I think.  I'm so glad that Joanna likes this style - it's just so easy!

Now for my blouse - I'm planning to use Colette's Sorbetto pattern - I've cut out the pieces, I just have to throw it together!

Monday, April 16, 2012

Napkins are not glamorous

I'm a little ashamed to admit that I just got around to making napkins to match these placemats that I made for my mother.  I blame it on the fact that napkins are not particularly exciting.  I really have no other excuse.  They certainly weren't difficult or intimidating, and I had all the fabric that I needed.


Because the placemats have a linen blend fabric in the center, I used the same fabric for one side of my napkins. On the reverse, I used a couple of the prints from the placemats.  I think they're great - heavy, yet soft; coordinating, but not too matchy-matchy.


I didn't do anything fancy - I cut 18"x18" pieces of fabric and sewed each piece of print fabric to a piece of linen, right sides together using about a 1/2" seam allowance.  I left about a 4" space for turning, clipped corners and turned.  I finished by topstitching around the edges, about 1/4" away from the edge.

Like I said - not very exciting, but beautiful and functional!  After giving these to my mother, she and I took the kids on a bike ride and I managed to get a funny sunburn on my forehead (I should have been wearing a helmet), forearms and neck.  Welcome, sun!

Monday, March 5, 2012

Skirt, Skirt

Here's a riddle:
What is better than sewing on a winter weekend afternoon?

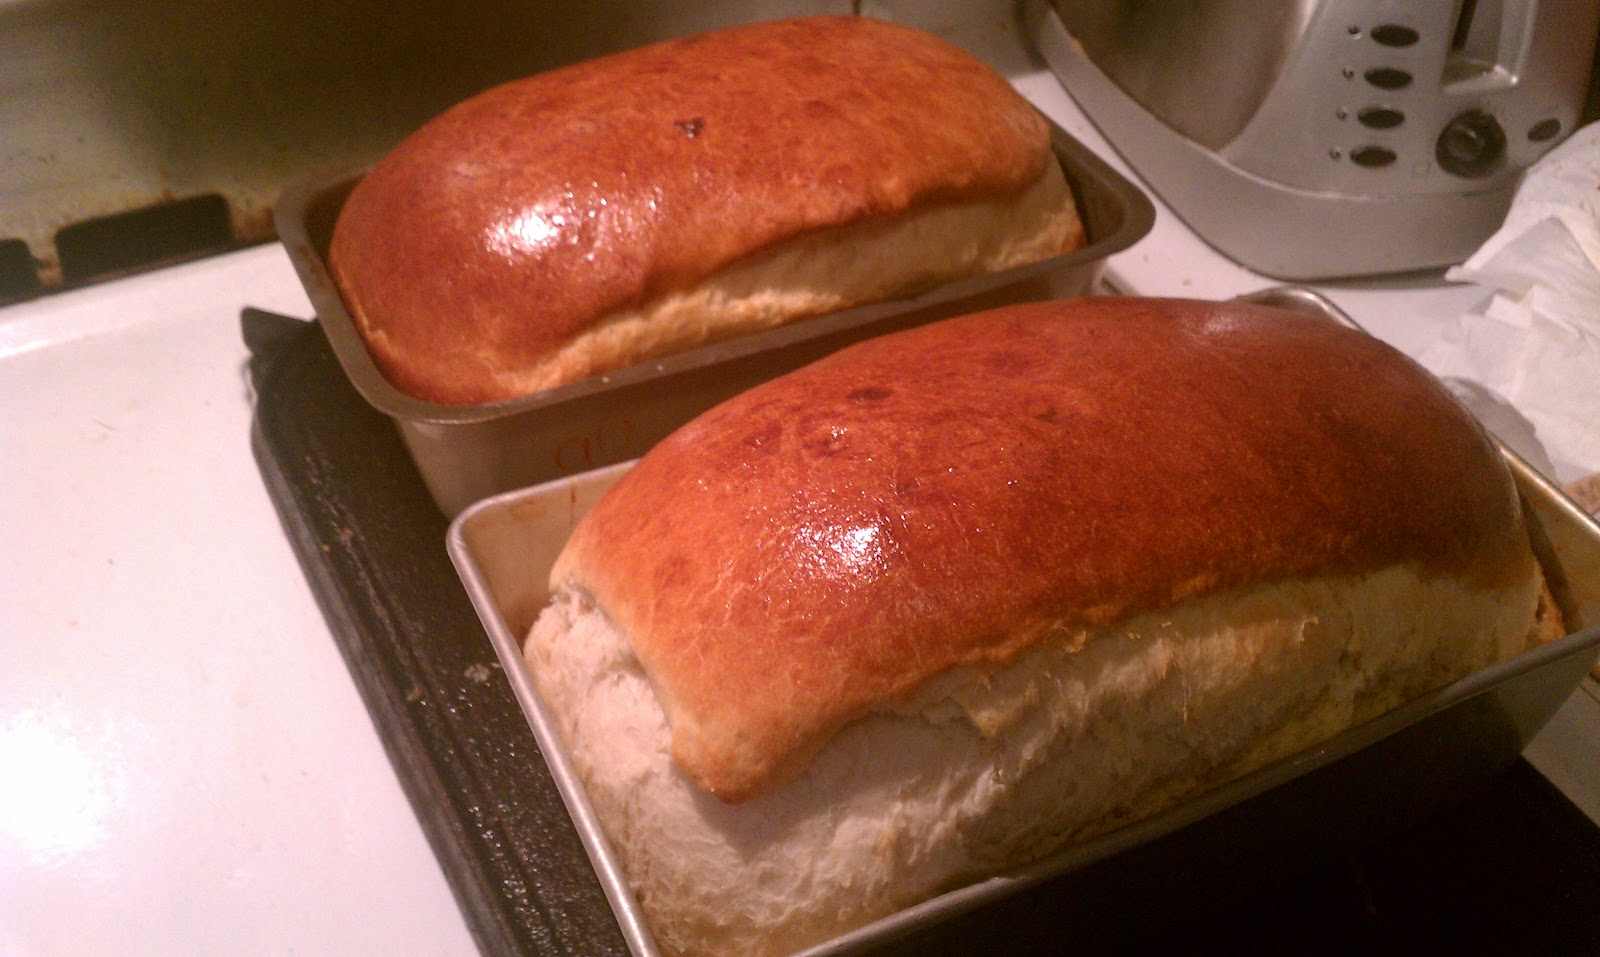
The answer, of course, is sewing while homemade bread bakes in the oven!


While this bread was baking, I made, not one, but two cute skirts for Joanna.  She had seen Michael Miller's Groovy Guitar fabric and wanted a skirt.  I was more than happy to oblige, but hesitant because she can be a little bit picky about fit (she's 11, so this is no surprise - it's only going to get worse). So, I started by making a skirt from Dena Designs Kumari Garden Holiday fabric before cutting into the Groovy Guitars.  My first skirt was deemed acceptable, so the second is very similar.  We got both fabrics at the lovely Sew to Speak!

This is the Kumari Garden Holiday skirt:


Now here's Joanna wearing her coveted Groovy Guitar skirt - I asked her to pose and she responded with something like "Aww, Mom, do I have to?"


Then, because she's a sweetheart, she posed for me:


In retrospect, I think past efforts have been over-complicated.  In the past, I've tried to teach Joanna the importance of  patterns, etc.  Ignoring my own advice, I didn't use a pattern for these skirts.  In fact, both were ridiculously simple.  Here's what I did:
  1. I used a yard of fabric for each skirt and cut two rectangles - 44"x18" each. If you want this skirt for yourself, you may have to play with the measurements a little - we can't all be skinny 11 year-olds with long legs.  To modify, cut your rectangles so that each one measures twice your waist measurement by (the length you want + 2).  So if I have a 34" waist and I want a skirt that is 25" long, I'll have to cut two rectangles that are about 68" x 27" (You could probably get away with measuring only 55" or 60" for the waist, though.  Your skirt will just be a little less full if you choose to cut a shorter piece).
  2. Right sides together, sew the short sides and finish the seams.  I used french seams for a neat look.
  3. Press the seams.
  4. Hem the bottom edge of the skirt - Fold and press the bottom edge 1/4" then again 1/2".  After pressing the hem, sew 1/8" from the fold.
  5. At the top of the skirt, fold the edge down 1/4" and press, then fold 1 1/8" and press.  Sew almost all the way around the pressed fold, about 1/8" from the edge.  Leave a 2" opening to insert elastic.
  6. Measure a piece of elastic that equals your waist measurement + 1".
  7. Using a safety pin, guide elastic through the casing that you have sewn, making sure you don't twist.
  8. Sew ends of elastic together.
  9. Finish sewing around the bottom of the casing.


And that's it! Alternatively, you could complete step 4 last, if you want to try the skirt on before hemming.  I find it a little easier to hem before it is all bunched up by the elastic, but it isn't a big deal.  On the Kumari Holiday skirt, I hemmed last, and on the Groovy Guitar skirt, I hemmed before inserting elastic.  Whatever works best for you.  


And there you go - two completely easy skirts that fit her perfectly, without the hassle of using a pattern. And Better yet, I ate warm slices of freshly baked bread while I made them!

Thursday, March 1, 2012

A Dino for Arlo

This is a very special dinosaur that I made for my very special new nephew.  He's colorful and soft and everything a new baby needs in a toy.  Of course, new babies don't really need anything at all in the way of toys, but I made it anyway.


His body is made from Michael Miller fabric from last year that I happened to have in my stash.  The eyes, spikes and bottoms of his feet are wool felt.  I used a pattern from the first One-Yard Wonders book, but made some changes.  In the book, the toy is designed to be mounted on a wooden base with wheels so that he can be pulled along.  Obviously, I didn't do that.  Also, the pattern in the book has the piece for the spikes laid out in a straight line, rather than curved to match the shape of the body.  I made one for my son using their straight pattern, and the felt spikes didn't turn out well.  This time, I traced a new pattern for the spikes, but used the body pattern as a guide.  Rather than being straight, my spikes were nicely curved.  This second attempt turned out really well.  The pattern called for button eyes, but, because it is for a baby, I replaced them with felt - I like the effect!

And here's the little man for whom the dino was made:

"I love looking at the pattern on my dinosaur!"
Welcome to the family, baby Arlo!

Wednesday, February 8, 2012

Imitation is the sincerest form of flattery


If imitation is the sincerest form of flattery, then Janelle at Sew to Speak should be super flattered.  I saw these placemats on the Sew to Speak blog and I absolutely had to make some myself.  Apparently, they are inspired by some that were available at Anthropologie, though I never saw them myself.  While making these, I thought a little sadly that I wouldn't keep them for myself.  Though I love the look of fabric placemats, having children has given me a heightened appreciation for cheap, plastic placemats that never have to be washed or ironed.  I gave these to my mother as a gift, and I think they'll be much happier in their new home.


I'm sure that, like me, others sometimes buy packs of coordinating fat quarters without really having a need for them.  This is a great project for a pretty bunch of fabric.  I don't know what Janelle's measurements for her placemats were, but this is what I did:

  • I bought a pack of 5 fat quarters and cut them into 4" strips.
  • The 4" strips were cut to lengths of 19" (A), 7.5" (B), 14.5" (C) and 12" (D).  To make 6 placemats, you'll need 6 pieces in each length.
  • Use a neutral fabric (like this linen-blend) and cut 6 pieces that measure 7.5"x12".   I think that it might be really neat to use a brightly-colored solid fabric in the center, too.  There are lots of things that could be done here. 
  • For three of the placemats, you'll sew piece B to both short sides of the linen with right sides together.  Press the seams open and sew piece A, right sides together, to the long sides.
  • For the other three placemats, sew piece D to the long sides of the remaining linen pieces, right sides together.  Press the seams open and sew piece C to the short sides of the linen piece that you've just created.
  • At this point, I recommend pressing all seams open.  The placemat should be about 18"x14".
  • Cut 6 pieces of iron-on interfacing to 18"x14" and attach it to the back of your placemats.
  • You'll want to use an embroidery hoop to hold your placemats while you embroider the stripes in the center.  
  • Use masking tape to mark even lines, either horizontal or vertical, on your placemats.  Mine are all vertical lines, but the Sew to Speak placemats used some horizontal stripes.
  • Using an embroidery needle and perle cotton or embroidery floss, stitch small lines along the edges of your masking tape.  The tops of the stitches should be a bit longer than the stitches on the underside.
  • Once you have finished stitching your lines, cut 6 pieces of home decor fabric or quilting fabric  to about 18"x14".
  • Right sides together, stitch the pieces together, leaving a 4" gap for turning.
  • Clip corners and turn placemat right-side out.  Press.
  • Sew around the placemat, about 1/8" from the edge.

These directions are very brief - I'm happy to elaborate for anyone who is interested.


I didn't have enough fabric to give all of the placemats matching backs - instead, I used some miscellaneous home decor fabric from Joann to complete the placemats.  All of my placemats are different on top, so I think that the mismatched backs are appropriate.

I just love the mismatched goodness of these placemats - I am so glad that I saw the originals on the Sew to Speak blog!