Tuesday, February 28, 2012

There comes a time

There comes a time in every girl's life when she realizes that if she's going to wear a scarf all day everyday, it needs to be super cute.  This winter, I've been wearing a plain black scarf almost everyday - it's an easy scarf to wear that is almost always on the hook by the front door.  But it's boring.

So, when I saw Anna Maria Horner's Figure 8 Scarf tutorial, I knew this would be just the thing to fix my boring scarf problem.  Also, I've been drooling over AMH's velveteen selection for months, and this is a great project to show off her printed velveteen.


Now that isn't boring, is it?


Instead of using voile, as the tutorial instructs, I decided to use quilting cotton from AMH's LouLouThi collection.  I imagine that my scarf is quite a bit more voluminous than it would be in voile, but I like it.  I had been trying to think of ways to use this XOXO Hugs and Kisses print, and it works really well with the Bubble Burst Sparkle Velveteen print that I used.


Now, the only problem will be that I'll want to wear the same thing every day.  And because it is so distinctive, people will notice.  Maybe I'll have to make a few more in other prints ;)

Sunday, February 26, 2012

Mixed up and Reversible

As promised, here are some photos of Josh wearing the Reversible Kickin' Back Sweats that I blogged about a few days ago.  They are a little bigger and longer than I thought they would be, which is probably a good thing.


When I picked Josh up from school, I was told that he disappeared into the bathroom a couple times to flip his reversible pants to the opposite side.  This could either be a good or bad thing.  Good because they are just awesome pants; bad because it sounds like it was distracting him from school and play.  Regardless, I'm glad that he seems to like them so much.


He's a happy kid.  Now it's probably time to make some clothes for big sister, don't you agree?

Thursday, February 23, 2012

Hello, Bearlo


Unfortunately, it is sometimes so exciting to make toys for younger kids, that it's easy to forget that older kids like toys, too.  Joanna was more than a little jealous to see the bunny I made for Josh and the dinosaur I made for Arlo.  When I saw the Barnaby Bear pattern in Fabric-by-Fabric One-Yard Wonders, I knew it would be just the thing for Joanna.  I had plenty of soft corduroy and fleece left over from a previous pattern.  We named him Bearlo, after her new cousin Arlo.  She's quite taken with him (the bear and the baby).


Even though this bear is for an eleven year-old, I decided to hand-embroider the eyes, instead of using plastic eyes or buttons.  I like the look just as well, and there is no possible way the eyes will fall off.  Anyone who is making this project for a very small child should be sure to hand stitch the eyes - anything plastic could potentially fall off.


If there is any advice that I have for others making this same project, it would be to make sure you don't over-stuff the arms and legs.  It will be much less of a headache to finish assembling the bear if he isn't super full.

Josh says that he would like a bear for himself, and I'll happily make one when I have more corduroy (or possibly velveteen!!!).  But for now, there are clearly no hard feelings.

Tuesday, February 21, 2012

Kickin' Back for Presidents' Day Weekend


Such a busy weekend of sewing!  I spent much of the long holiday weekend hand-quilting my Hootenanny quilt, and I am pleased to report that it is mostly done.  I quilted until I was drowsy and my index finger was sore.  In fact, I spent so much time hand-sewing that I was yearning for my sewing machine by yesterday afternoon.  Luckily, I had a quick project in mind.


I've been meaning to participate in the Boy, Oh, Boy, Oh Boy 'Sewing for Boys' Sew Along, and this weekend seemed like the perfect time to make the February pattern.  The Kickin' Back Sweats are a fairly straightforward design - roomy, soft pants with a big optional pocket and a stretchy waistband.  The pattern seems very easy to follow, though admittedly, I didn't follow it exactly.


I decided that this pattern was a perfect opportunity to make reversible pants!  I had some heavy blue and white striped canvas that I thought would be perfect.  For the reverse side, I went to Sew to Speak and bought the quilting-weight Osteology Alexander Henry fabric.  I think the blue and white stripe is perfect for spring (though I think Josh will be more likely to wear the pants with the AH fabric showing), and the cuffs are great for rolling up.  I was a little worried about the length, so I thought it may be better if they were intended to be rolled up, making them more like long shorts.  I'm picturing him wearing these with a sweatshirt while he climbs trees in April.  Of course, the winter has been so mild that I think he could roll up the cuffs and climb trees now!


Truthfully, there isn't much that has to be done differently to make these pants reversible, though you have to double all fabric requirements, as you are essentially making two pairs of pants.  If you would like to make your own reversible Kickin' Back Sweats, follow the instructions from the book, up to the sewing of the waist casing.

  • At this point, turn one pair of pants right side out and the other inside out; place the right-side out pair inside the inside out pair, matching up seams.  This is very similar to the step that connects the two legs at the inseam.  
  • Once you have pinned the two pairs of pants together around the top of the waistband, sew completely around the top, about 1/4" from the edge, overlapping the beginning and end of the stitching.  
  • Pulling the pants through the leg openings, turn the pants so both pairs are right side out.  At this point, the pants are attached at the waist and the legs are pointing in opposite directions.  
  • Press the seam that connects the two pairs of pants.  Also turn the  bottom cuffs of the pants about 1/4" to the wrong side and press.  
  • Now, insert one pair of pants into the other pair so their wrong sides are facing.
  • To make the waist casing, sew around the top of the pants, 1 1/8" from the top seam.  Leave about 2" open to insert the elastic.  
  • You will have to reach up one of the legs to insert the elastic into the waist casing.  Use a safety pin and be very careful not to twist the elastic.
  • Sew the ends of the elastic together, once you have checked to make sure that it isn't twisted.
  • Finish sewing the waist casing closed.
  • Topstitch the cuffs closed about 1/8" from the bottom.  This should completely seal the pant legs with the pressed raw edges inside.
Please let me know if you have questions about how I did any of this!  


Josh was asleep last night when I finished these, so I don't have any shots of him wearing them yet.  Hopefully, that will be remedied in the next day or two.  More photos to come!

Sunday, February 19, 2012

Gazillions of Gathers Pillow

Another family gift exchange pillow!  About a week ago, I posted a photo of my first gift exchange pillow.  This second pillow is quite different, but also lovely. This pattern from ‘Fabric by Fabric One-Yard Wonders’ was a big success.  The directions recommend a lightweight fabric, but I used quilting weight and it worked perfectly.  I happened to have this striped/floral fabric in my stash at home - the stripes really helped to keep my smocking even.  Rather than using chalk to draw evenly spaced lines, I just followed the lines on the pattern! 

Thursday, February 16, 2012

Josh's Treasure Pocket Pants Redux


I already wrote about the lovely Treasure Pocket Pants pattern from 'Sewing for Boys'.  I liked them so much I made a second pair.  This time I used some soft, tan corduroy and a Dog print fabric by Tammis Keefe.  Instead of using contrast fabric for the waistband, I used the main fabric, mostly because my piece of Puppy fabric wasn't wide enough to cut one long strip; I would have had to piece it, or have sideways dogs.  Josh is (obviously) pretty happy with them.


 I finished sewing these pants late on Friday night, and I left them on the back of a chair, expecting Josh to see them.  Sure enough, when I came downstairs on Saturday morning, he was wearing his new pants!  Seeing a cute kid in cozy new pants makes this mama very happy.


Monday, February 13, 2012

Fantastic Fabric Flowers


Last night, Joanna and I attended a Felt and Fabric Flower class at Sew to Speak.  So fun!  These hand-sewn flowers were easy to make without a pattern.  We each made one during class - Joanna made one to attach to her barrette and I made a plaid flower.


I had so much fun that I made this polka dot flower when we got home!  I'm seeing many more fabric flowers in our future!

Sunday, February 12, 2012

Inch by Inch, Row by Row


I started piecing this quilt months ago.  The design is the Hootenanny quilt by Boo Davis from her book, Dare to be Square.  It's going to be lovely when finished - I made it larger by adding a border of printed fabric (so it will fit a grown-up bed).


I had planned to finish it by machine quilting, as I have in the past, but I decided to try hand-quilting.  I was inspired by Mary, one of the lovely employees of Sew to Speak - her blog, Molly Flanders, shows some of her beautifully hand-quilted creations.  I'm teaching myself to hand-quilt using a Molly Flanders tutorial and an Anna Maria Horner tutorial.  Both ladies do a great job of explaining the hand-quilting technique.


So now I have several square feet of quilt to practice with.  Slowly (very slowly), I'm getting used to the process involved in stitching rows using Perle cotton.  It's liberating to sit on the floor to quilt, rather than having to sit in front of the sewing machine.  It's still a big process, but it feels less complex.  This, I think, is peaceful and calming - the way quilting should be.


I'm pleased with the results thus far.  I think hand-quilting gives a project a more unique, handmade feel.  It's not quite perfect, but that's what makes it special. As Mary said - "You can buy perfect at Macy's."  And who wants that?


There will be pictures of my beautifully imperfect quilt when it is finished.

Wednesday, February 8, 2012

Imitation is the sincerest form of flattery


If imitation is the sincerest form of flattery, then Janelle at Sew to Speak should be super flattered.  I saw these placemats on the Sew to Speak blog and I absolutely had to make some myself.  Apparently, they are inspired by some that were available at Anthropologie, though I never saw them myself.  While making these, I thought a little sadly that I wouldn't keep them for myself.  Though I love the look of fabric placemats, having children has given me a heightened appreciation for cheap, plastic placemats that never have to be washed or ironed.  I gave these to my mother as a gift, and I think they'll be much happier in their new home.


I'm sure that, like me, others sometimes buy packs of coordinating fat quarters without really having a need for them.  This is a great project for a pretty bunch of fabric.  I don't know what Janelle's measurements for her placemats were, but this is what I did:

  • I bought a pack of 5 fat quarters and cut them into 4" strips.
  • The 4" strips were cut to lengths of 19" (A), 7.5" (B), 14.5" (C) and 12" (D).  To make 6 placemats, you'll need 6 pieces in each length.
  • Use a neutral fabric (like this linen-blend) and cut 6 pieces that measure 7.5"x12".   I think that it might be really neat to use a brightly-colored solid fabric in the center, too.  There are lots of things that could be done here. 
  • For three of the placemats, you'll sew piece B to both short sides of the linen with right sides together.  Press the seams open and sew piece A, right sides together, to the long sides.
  • For the other three placemats, sew piece D to the long sides of the remaining linen pieces, right sides together.  Press the seams open and sew piece C to the short sides of the linen piece that you've just created.
  • At this point, I recommend pressing all seams open.  The placemat should be about 18"x14".
  • Cut 6 pieces of iron-on interfacing to 18"x14" and attach it to the back of your placemats.
  • You'll want to use an embroidery hoop to hold your placemats while you embroider the stripes in the center.  
  • Use masking tape to mark even lines, either horizontal or vertical, on your placemats.  Mine are all vertical lines, but the Sew to Speak placemats used some horizontal stripes.
  • Using an embroidery needle and perle cotton or embroidery floss, stitch small lines along the edges of your masking tape.  The tops of the stitches should be a bit longer than the stitches on the underside.
  • Once you have finished stitching your lines, cut 6 pieces of home decor fabric or quilting fabric  to about 18"x14".
  • Right sides together, stitch the pieces together, leaving a 4" gap for turning.
  • Clip corners and turn placemat right-side out.  Press.
  • Sew around the placemat, about 1/8" from the edge.

These directions are very brief - I'm happy to elaborate for anyone who is interested.


I didn't have enough fabric to give all of the placemats matching backs - instead, I used some miscellaneous home decor fabric from Joann to complete the placemats.  All of my placemats are different on top, so I think that the mismatched backs are appropriate.

I just love the mismatched goodness of these placemats - I am so glad that I saw the originals on the Sew to Speak blog!


Monday, February 6, 2012

Patched Skull Pillow

The photo doesn’t really do justice to this lovely pillow.  I used Amy Butler Lark fat quarters and adapted a Boo Davis pattern from ‘Whip Up Mini Quilts’ (I simplified the pattern a lot - fewer small pieces).  In Boo Davis's pattern, the pieces are all just about 1.5'x2.5', whereas my pieces of fabric are all cut in horizontal strips.  The original pattern results in a really neat zig-zag design.  Mine is just striped, but the effect is really lovely, I think.  My sister was lucky enough to get this in our family's Christmas gift exchange.

The more I look at it, the more I think that I need to make another one of these for myself!

Saturday, February 4, 2012

A Day in the Park Backpack Tote


I love making bags - it may be completely impractical for me to keep making them, but I can't help it.  A new bag is always a treat.  And when it comes to sewing patterns, a purse is just right for an evening project.  Not too complicated or time-consuming, but incredibly satisfying.  Needless to say, I have tons of handmade purses.


BUT, I now think that I may have found the perfect bag.  I recently made the 'A Day in the Park' Backpack Tote' by Liesl and Co and it is everything I could possibly want.  It's cute, practical, roomy, sturdy and can be carried on my back or my shoulder.  As a mom, I feel like I'm always juggling too many things; the option to wear the bag as a backpack is a huge advantage for me.  The design is really perfect!


The clever convertible handle is achieved by running the straps through metal rings.  I had a hard time finding the right kind of rings for the project.  Joann didn't have exactly what I wanted, so I bought these wider rings as a substitute.  I was worried that they wouldn't look right, but it turned out beautifully.  The fabric is an Alexander Henry home dec print for the exterior and Joel Dewberry for the lining (both from Sew to Speak).

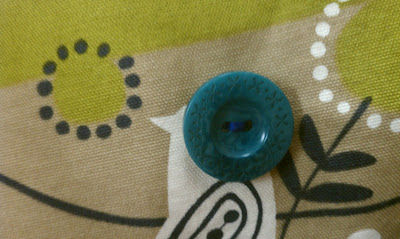
This pattern also has lots of roomy pockets:  One zippered, a few open pockets, and the large front pocket.  The sizes of the pockets can be pretty easily adjusted to suit your needs:  I have pockets that perfectly fit my cell phone, wallet and pens.  And I'm completely in love with the button that I used to close the front pocket - So cute!


To amend what I said earlier, all bags are not simple to sew.  This particular pattern was slightly more complex that your average bag.  There are steps involving basting canvas for reinforcement, lots of interfacing, snaps and zippers.  But the instructions are very straightforward, so it should be easy enough to follow.  Most of the pattern pieces consisted of rectangles, all of which were included on the pattern itself.  This surprised me - why not just provide instructions to cut rectangles in the specific sizes?  The inclusion of all rectangular pieces wasn't necessarily a downside, but it didn't seem completely necessary.

I have a feeling that I'll eventually be making more of these bags in different prints.  Despite the fact that I'm in love with this pattern, I'm sure it won't cure me of my bag-making addiction.  Soon enough, I'll be sewing other totes - in fact, I just reserved a book from the library that's sure to have some promising patterns!

Thursday, February 2, 2012

Josh's Penguin Treasure Pocket Pants

If the little boys that you know are anything like my son, they like to pick out really impractical prints at the fabric store.  Recently, I was left wondering how I would make stylish pants out of the penguin fabric that Josh selected - he specifically said that he wanted me to make pants with it.  So, I was super excited when I saw the Treasure Pocket Pants pattern in Sewing for Boys.  These pants are a great way to showcase a neat print while using a sturdy, practical fabric as the body of the pants.


I used the quilting-weight Penguin fabric for the side-panel accent, and a sturdy denim from Sew to Speak for the body of the pants.  They turned out great!  Josh looks stylin' in them, and the mix of fabrics was a good compromise.


The book isn't exactly clear about how to achieve the look in the photo - experienced readers will pick up on the differences, but others may not.  In the book's photo, the accent fabric doesn't go all the way up to the waistband, but Josh's pants have penguins all the way up the side.  The book doesn't do a good job of explaining that they've followed different cutting instructions to get the pictured product.  This wasn't a problem for me, but others might be bothered by this.


Overall, Sewing for Boys is a really nice book.  I wish they included more pictures and diagrams for the patterns themselves, though the big pictures of the finished products are really nice.  I'm just disappointed that the patterns only go up to Size 6-7. Unfortunately, my 6 year-old boy won't be able to fit in these clothes much longer.  Perhaps my (soon to be born) nephew will need some Treasure Pocket Pants of his own someday!  In the meantime, I'm planning to make another pair for Josh with some tan cord and red puppy fabric.